Macrophotography setup for high magnification and high resolution
Last Updated: 11th Aug 2014By Stephan Wolfsried
Working on macrophotography of minerals for now more than ten years I want to share the best practice of the equipment used with interested members.

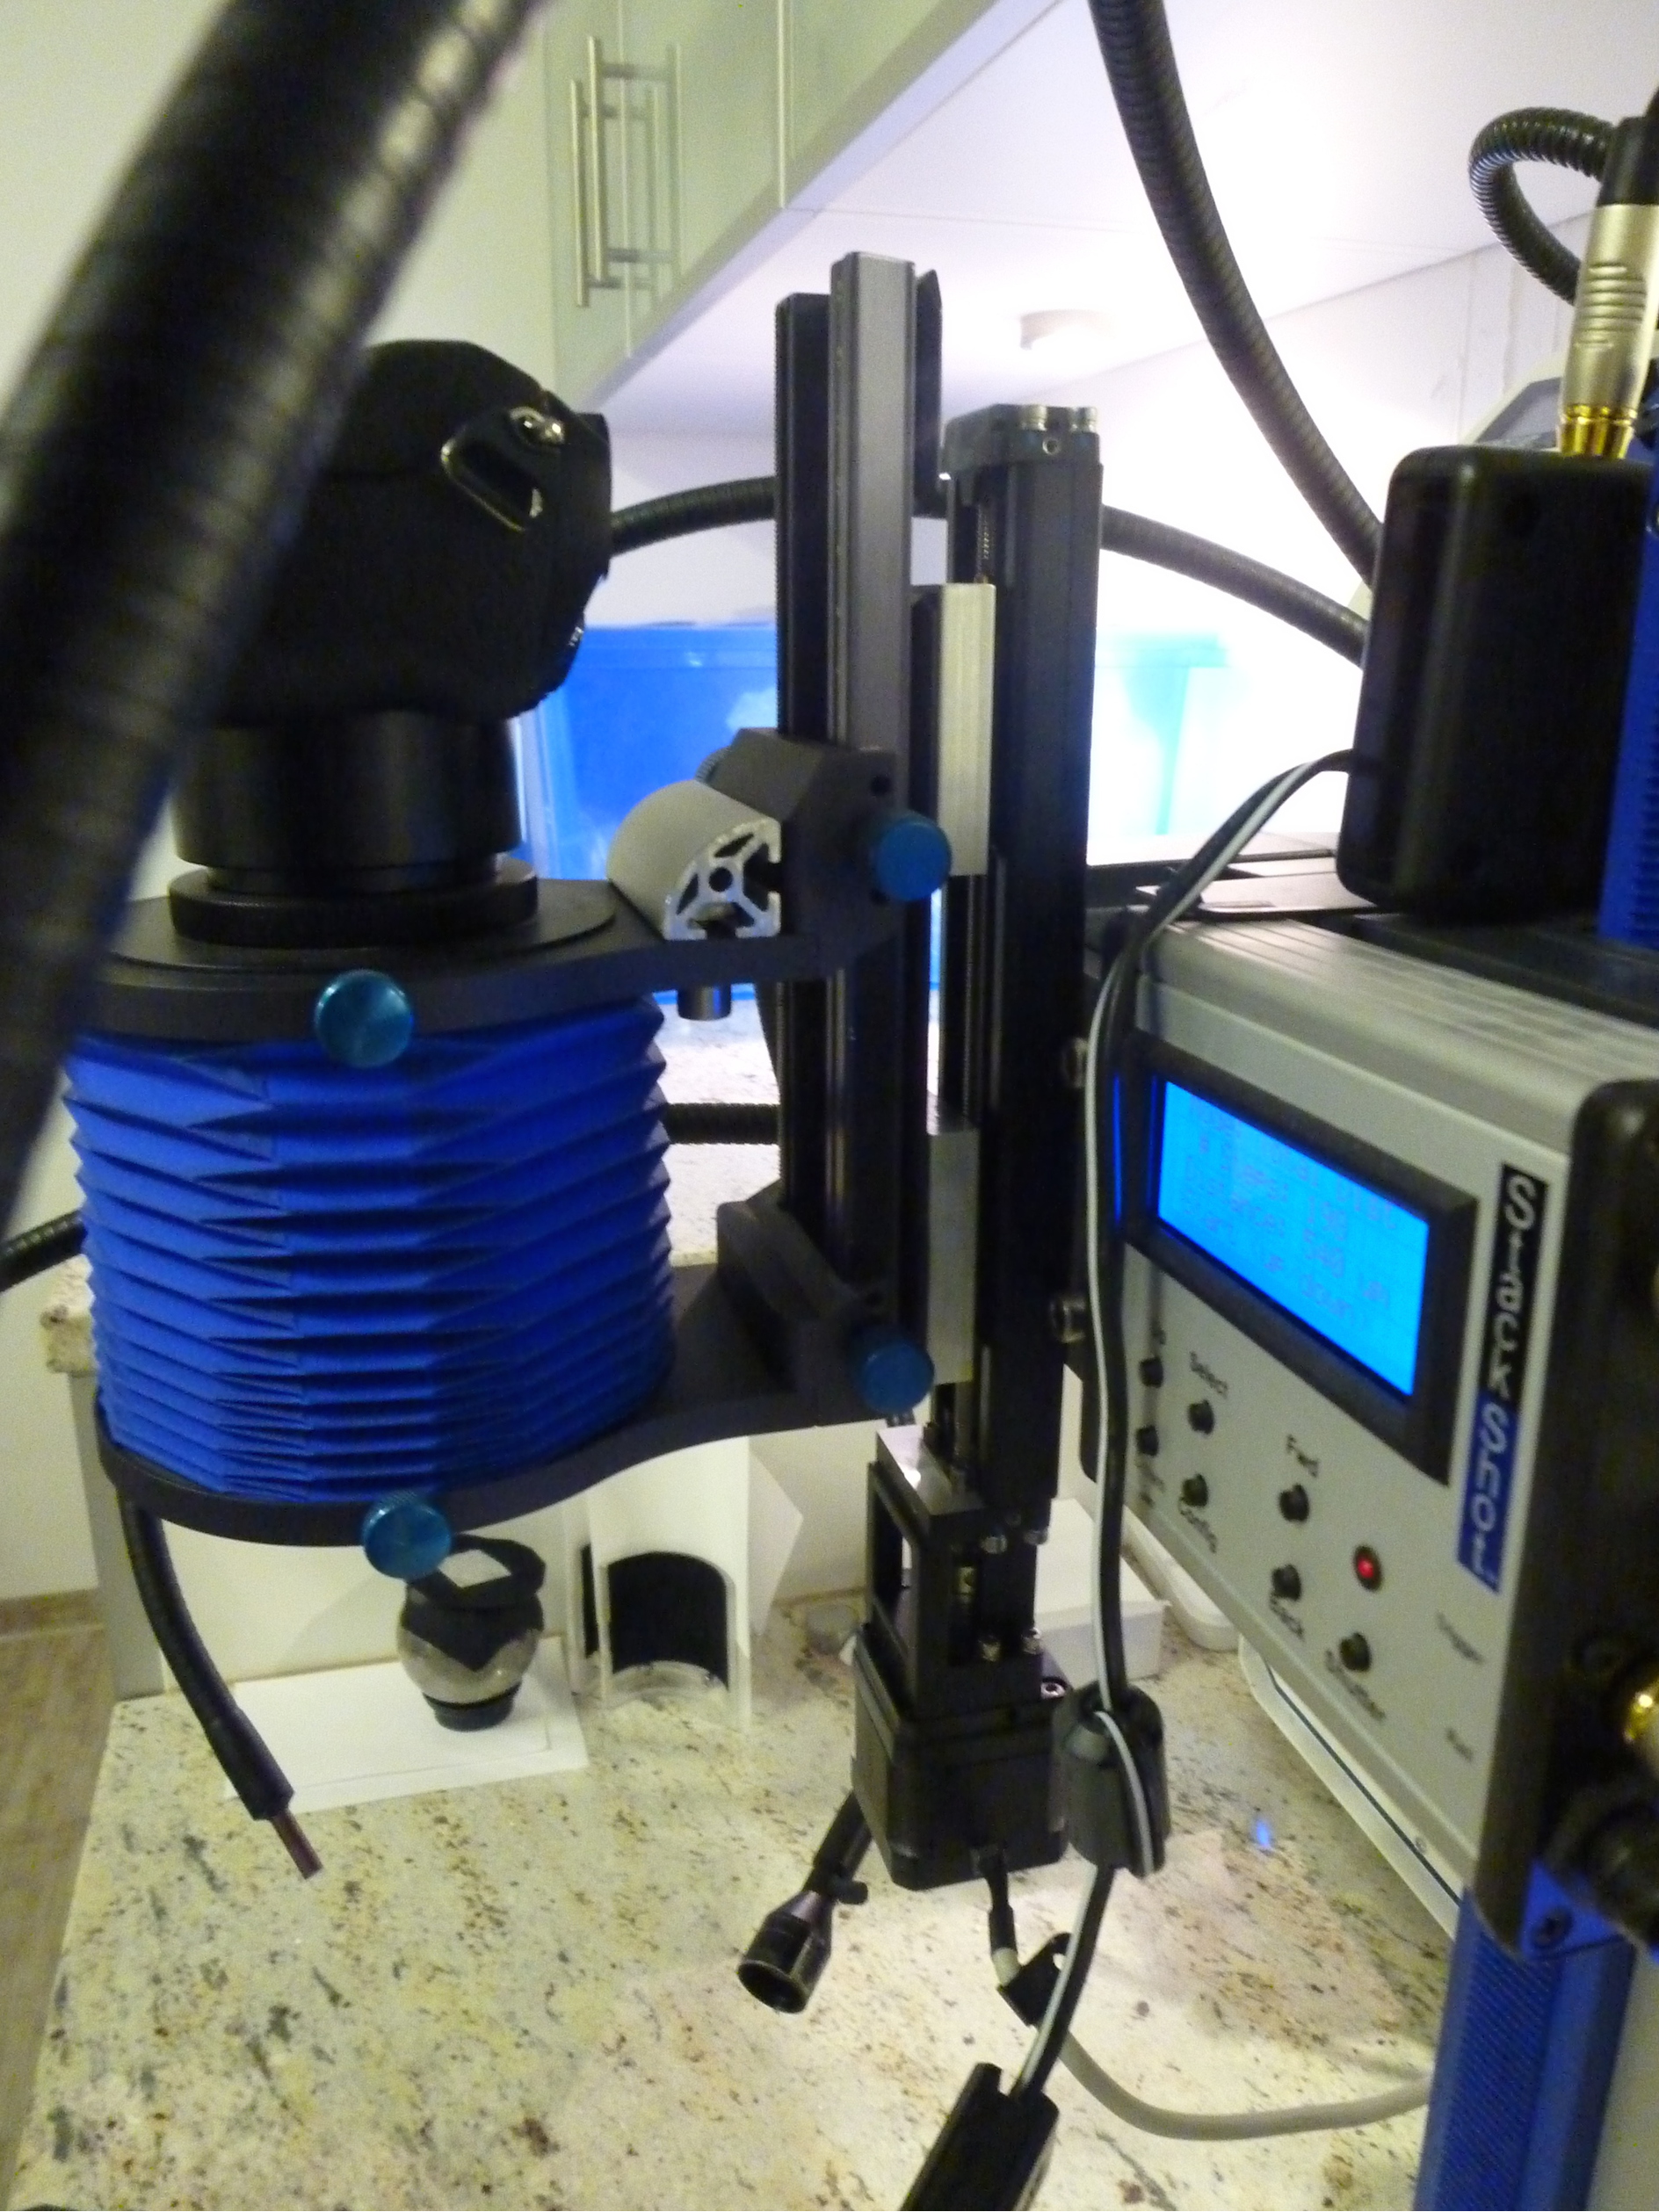
As stative works the motor driven binocular stand from Carl Zeiss, which is controlled with the little joystick pad on the right side. Its resolution is 0.01 mm. This scale is useful to measure the overall extension of the probe which I have to provide when stacking. The stative is mounted on a 125 kg desk plate of Granite to ensure robustness against externally introduced vibrations. Three halogen light sources with fibre optic illuminators from Schott can be used. Normally I use two of them with two gooseneck illuminators each. The third light source is prepared for a ring light which can be put around the objective. I refuse using LED illumination for the following reason: LEDs do not provide a continuous spectrum. White LEDs have a blue and yellow spike to make You believe it's white light. Minerals which are not white will have very often an unnatural color under LED light.
Where normally the microscope pankrat is mounted I placed a plate with the linear actor to bear the bellows with camera and objectives.
Good to see is the Cognisys stack shot control device to achieve the small increments necessary for high resolution macro photos.
The Cognisys rail is replaced by an different design I will describe later on.
The vertical assembly completely corresponding to the Carl Zeiss Bino Discovery V.20 allows to manipulate and observe the probe under the microscope first and then put it in exactly this position under the bellows. The smaller the object, the more difficult is it to find it under the bellows. Choosing the right view angle and scope under the bellows is too cumbersome.

Shown here is the assembled bellows with the Mitutoyo M Plan 10x on an analog Nikkor 180 mm f/2,8 ED objective as focus lens.
I use several of this objectives in parallel. The bayonet of the Nikkor objectives enables a quick change.
The camera I actually use is the Sony Nex 7. It is a mirrorless Micro Four Thirds (MFT) camera. It has a 24 MP APS-C sensor and a infrared remote shutter release. It can be controlled by the Stack Shot controller via the universal infrared remote control extension. A 200-250 picture stack runs automatically and requires about half an hour. The ability of a camera to be released with a remote control, wired or infrared doesn't matter, is crucial for taking a stack fully automatically without touching the assembly during this procedure. Due to frequent changes of the objectives it is unavoidable getting dust on the sensor of the camera. Regularly cleaning of the sensor is therefore mandatory. I use Helicon Focus for stacking, Nikon Capture for adjusting brightness and contrast and a photo improvement tool from Microsoft called picture it! to erase dust artifacts.
The side view of my setup shows another detail: The bellows wasn't designed for maximum stiffness. A reinforcement of the upper bracket makes it more stiff. The lower bracket is fixed to the bellows ridge which is mounted to the rail in this area.
The upper sledge is 100 mm above and the bellows ridge is mounted to it in the middle of the bellows extension range.

The original Cognisys rail is not stiff enough for extremely high magnification pictures. The shutter of my Sony Nex 7 causes vibrations which needed some seconds to calm down. Taking typically 200 pictures per each stack this time accumulates. With the shown rail I could overcome this problem while maintaining the Stack Shot control unit which is rather comfortable to use. The shorter rail was my first attempt, but then I learned that there is a possibility in using two sledges on the same spindle. This admits a wider base for assembling the bellows ridge on it. I bought a couple of those rails on Ebay and got the additional sledge from one of them. Disassembling the sledge leads into a loss of some balls which fell apart, most of them I could reassemble in the new rail again. Pressing some grease with a grease gun in the sledges grease nipple (the brass pins visible in the picture) made the second sledge running smooth again. The challenge is avoiding stick slip effects in the bearing even at very low increments. Those linear actors made by THK are normally designed for CNC machines. The bearings run with a slight prestress. While watching a stack running through with Helicon Focus You can see no lateral movement anymore, which was more or less normal before.

This picture shows my best resolution with a FOV of 0.9 mm. This requires that the setup is stiff enough, the increments of the linear actor are around 0.001 mm and the resolution of the objective is also 0.001 mm. Log in and view the photo in the HR version, the two child photos are taken with different objectives. The most frequent FOVs I am dealing with are from 1 mm to 4 mm. Sometimes crystals are very small, so that FOVs below 1 mm are crucial to show the details.
With the APS-C Sensor of the Sony Nex 7 the FOVs with different objectives I actually use are as follows:
With the Mitutoyo M Plan 20x and a Nikkor 180 mm f/2,8 ED the FOVs are from 0.53 mm to 0.9 mm depending on bellows extension.
With the Mitutoyo M Plan 10x and a Nikkor 180 mm f/2,8 ED the FOVs are from 1.05 mm to 1.8 mm.
With the Mitutoyo M Plan 5x and a Nikkor 180 mm f/2,8 ED the FOVs are from 2.1 mm to 3.6 mm.
The bellows has 150 mm extension. If it had 30 mm more there would be a seamless FOV variety possible.
I asked Novoflex to build an extra long bellows but they told me it would be too complicated.
They recommended to put two bellows in row with the fixed side together. That is what I will do and report next.
Setup overview
As stative works the motor driven binocular stand from Carl Zeiss, which is controlled with the little joystick pad on the right side. Its resolution is 0.01 mm. This scale is useful to measure the overall extension of the probe which I have to provide when stacking. The stative is mounted on a 125 kg desk plate of Granite to ensure robustness against externally introduced vibrations. Three halogen light sources with fibre optic illuminators from Schott can be used. Normally I use two of them with two gooseneck illuminators each. The third light source is prepared for a ring light which can be put around the objective. I refuse using LED illumination for the following reason: LEDs do not provide a continuous spectrum. White LEDs have a blue and yellow spike to make You believe it's white light. Minerals which are not white will have very often an unnatural color under LED light.
Where normally the microscope pankrat is mounted I placed a plate with the linear actor to bear the bellows with camera and objectives.
Good to see is the Cognisys stack shot control device to achieve the small increments necessary for high resolution macro photos.
The Cognisys rail is replaced by an different design I will describe later on.
The vertical assembly completely corresponding to the Carl Zeiss Bino Discovery V.20 allows to manipulate and observe the probe under the microscope first and then put it in exactly this position under the bellows. The smaller the object, the more difficult is it to find it under the bellows. Choosing the right view angle and scope under the bellows is too cumbersome.
Setup overview with bellows and objective
Shown here is the assembled bellows with the Mitutoyo M Plan 10x on an analog Nikkor 180 mm f/2,8 ED objective as focus lens.
I use several of this objectives in parallel. The bayonet of the Nikkor objectives enables a quick change.
The camera I actually use is the Sony Nex 7. It is a mirrorless Micro Four Thirds (MFT) camera. It has a 24 MP APS-C sensor and a infrared remote shutter release. It can be controlled by the Stack Shot controller via the universal infrared remote control extension. A 200-250 picture stack runs automatically and requires about half an hour. The ability of a camera to be released with a remote control, wired or infrared doesn't matter, is crucial for taking a stack fully automatically without touching the assembly during this procedure. Due to frequent changes of the objectives it is unavoidable getting dust on the sensor of the camera. Regularly cleaning of the sensor is therefore mandatory. I use Helicon Focus for stacking, Nikon Capture for adjusting brightness and contrast and a photo improvement tool from Microsoft called picture it! to erase dust artifacts.
side view
The side view of my setup shows another detail: The bellows wasn't designed for maximum stiffness. A reinforcement of the upper bracket makes it more stiff. The lower bracket is fixed to the bellows ridge which is mounted to the rail in this area.
The upper sledge is 100 mm above and the bellows ridge is mounted to it in the middle of the bellows extension range.
rail variants
The original Cognisys rail is not stiff enough for extremely high magnification pictures. The shutter of my Sony Nex 7 causes vibrations which needed some seconds to calm down. Taking typically 200 pictures per each stack this time accumulates. With the shown rail I could overcome this problem while maintaining the Stack Shot control unit which is rather comfortable to use. The shorter rail was my first attempt, but then I learned that there is a possibility in using two sledges on the same spindle. This admits a wider base for assembling the bellows ridge on it. I bought a couple of those rails on Ebay and got the additional sledge from one of them. Disassembling the sledge leads into a loss of some balls which fell apart, most of them I could reassemble in the new rail again. Pressing some grease with a grease gun in the sledges grease nipple (the brass pins visible in the picture) made the second sledge running smooth again. The challenge is avoiding stick slip effects in the bearing even at very low increments. Those linear actors made by THK are normally designed for CNC machines. The bearings run with a slight prestress. While watching a stack running through with Helicon Focus You can see no lateral movement anymore, which was more or less normal before.
objective comparison
This picture shows my best resolution with a FOV of 0.9 mm. This requires that the setup is stiff enough, the increments of the linear actor are around 0.001 mm and the resolution of the objective is also 0.001 mm. Log in and view the photo in the HR version, the two child photos are taken with different objectives. The most frequent FOVs I am dealing with are from 1 mm to 4 mm. Sometimes crystals are very small, so that FOVs below 1 mm are crucial to show the details.
With the APS-C Sensor of the Sony Nex 7 the FOVs with different objectives I actually use are as follows:
With the Mitutoyo M Plan 20x and a Nikkor 180 mm f/2,8 ED the FOVs are from 0.53 mm to 0.9 mm depending on bellows extension.
With the Mitutoyo M Plan 10x and a Nikkor 180 mm f/2,8 ED the FOVs are from 1.05 mm to 1.8 mm.
With the Mitutoyo M Plan 5x and a Nikkor 180 mm f/2,8 ED the FOVs are from 2.1 mm to 3.6 mm.
The bellows has 150 mm extension. If it had 30 mm more there would be a seamless FOV variety possible.
I asked Novoflex to build an extra long bellows but they told me it would be too complicated.
They recommended to put two bellows in row with the fixed side together. That is what I will do and report next.
Article has been viewed at least 13138 times.


Discuss this Article


