Home PageAbout MindatThe Mindat ManualHistory of MindatCopyright StatusWho We AreContact UsAdvertise on Mindat
Donate to MindatCorporate SponsorshipSponsor a PageSponsored PagesMindat AdvertisersAdvertise on Mindat
Learning CenterWhat is a mineral?The most common minerals on earthInformation for EducatorsMindat ArticlesThe ElementsThe Rock H. Currier Digital LibraryGeologic Time
Minerals by PropertiesMinerals by ChemistryAdvanced Locality SearchRandom MineralRandom LocalitySearch by minIDLocalities Near MeSearch ArticlesSearch GlossaryMore Search Options
The Mindat ManualAdd a New PhotoRate PhotosLocality Edit ReportCoordinate Completion ReportAdd Glossary Item
Mining CompaniesStatisticsUsersMineral MuseumsClubs & OrganizationsMineral Shows & EventsThe Mindat DirectoryDevice SettingsThe Mineral Quiz
Photo SearchPhoto GalleriesSearch by ColorNew Photos TodayNew Photos YesterdayMembers' Photo GalleriesPast Photo of the Day GalleryPhotography
╳Discussions
💬 Home🔎 Search📅 LatestGroups
EducationOpen discussion area.Fakes & FraudsOpen discussion area.Field CollectingOpen discussion area.FossilsOpen discussion area.Gems and GemologyOpen discussion area.GeneralOpen discussion area.How to ContributeOpen discussion area.Identity HelpOpen discussion area.Improving Mindat.orgOpen discussion area.LocalitiesOpen discussion area.Lost and Stolen SpecimensOpen discussion area.MarketplaceOpen discussion area.MeteoritesOpen discussion area.Mindat ProductsOpen discussion area.Mineral ExchangesOpen discussion area.Mineral PhotographyOpen discussion area.Mineral ShowsOpen discussion area.Mineralogical ClassificationOpen discussion area.Mineralogy CourseOpen discussion area.MineralsOpen discussion area.Minerals and MuseumsOpen discussion area.PhotosOpen discussion area.Techniques for CollectorsOpen discussion area.The Rock H. Currier Digital LibraryOpen discussion area.UV MineralsOpen discussion area.Recent Images in Discussions


Mineral PhotographyMy Christmas/Birthday Present
26th Dec 2011 04:46 UTCRobert Simonoff

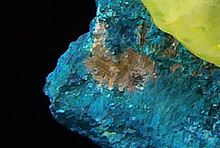
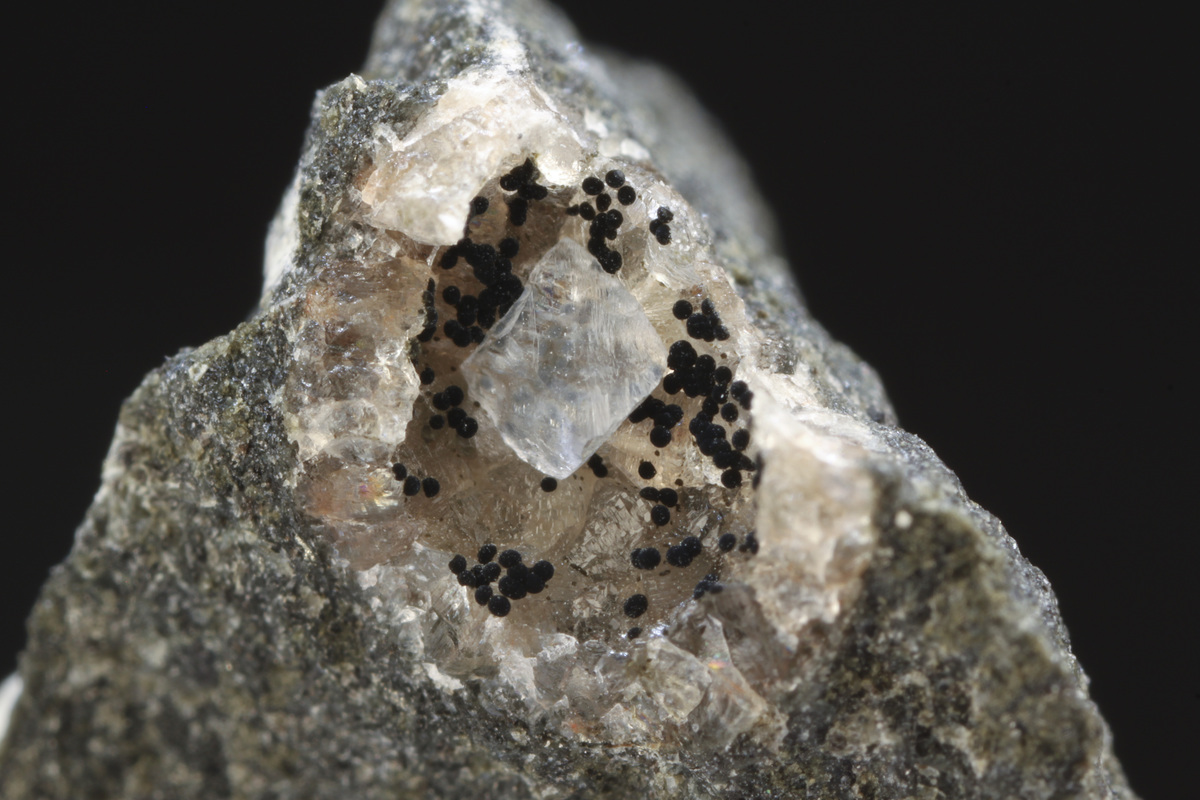
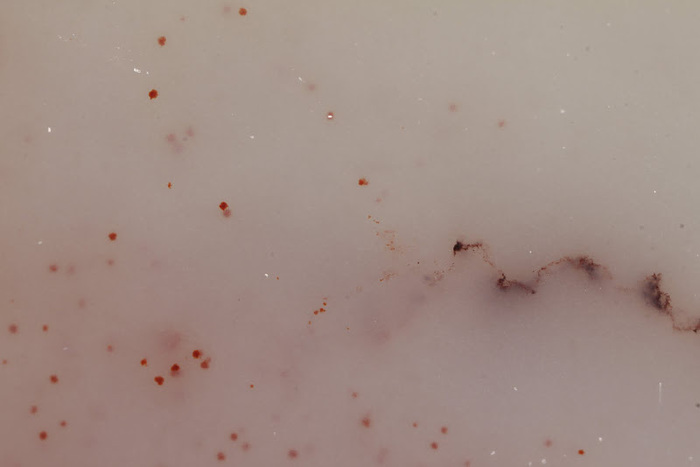
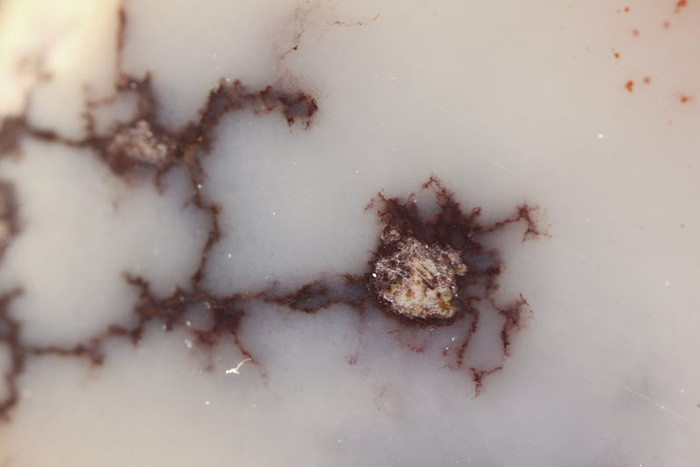
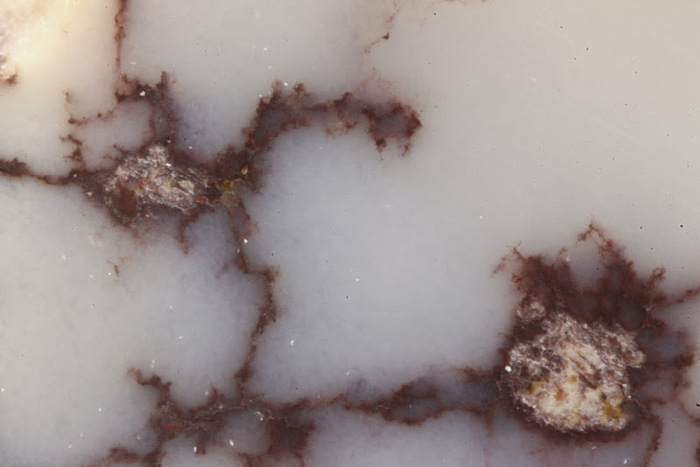
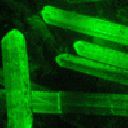
The subject I started out with (my very first shots so you can see where I am starting from) is from Sugar Grove, West Virginia, USA. It is an analcime coated vug with a calcite crystal inside. There are balls of nontronite scattered throughout the vug. When the vugs are opened, the nontronite becomes black. But before being exposed to air or light, however, the nontronite is blue - as can be seen when it is included in the calcite.
I took 3 pictures at each of different magnifications, for a total of 12 pictures. I kept the best picture at each magnification. I used a Canon EOS Rebel T1i. I used a tripod with a sliding macro mount. And for lighting, I used 3 desk lamps crowded around the micromount (LOL!!).
Here are the shots:
This picture had more magnification

This picture has even more magnification

This final picture was the highest I took
I should point out that the final picture was not the highest magnification available on the lens. But it was the highest magnification I could take given the lighting conditions. As I added more magnification, the lens got closer to the specimen. That closeness and the distance through the lens that the light traveled conspired to lose enough light that the desk lamps were simply not enough. I had to keep the shutter open long enough that my focus was not as sharp as I wanted. I may need to remedy that :-)
For those of you that take offense at poor photography please excuse these first attempts. I am still learning and have decided not to do any post processing of these pictures other than white balance and 20% sharpening. no cropping, no color twiddling, no clean up, nor other enhancement of any kind. I know I need to figure out much with respect to setting up the shot, lighting, editing and probably a dozen other things. Advice for improvement is welcome, but help such as this sucks and doesn't belong on mindat won't be terribly helpful.
But the real purpose of sharing these pictures is that I have not seen anything definitive in mindat about this lens. I am not really qualified to review it, but I can take some pictures and share more as I learn.
Thanks
Bob

26th Dec 2011 04:51 UTCDouglas Merson 🌟 Expert
http://www.photomacrography.net/
They have lots of good info there on many aspects of macro photography.
Doug

26th Dec 2011 08:50 UTCMalcolm Southwood 🌟 Expert
I've had the pleasure of a very similar Christmas gift, but of the Nikkon variety (the 60mm "micro" lens). I've also had the luxury of a whole afternoon to play with it today.
A truly remarkable piece of kit, but the standout conclusion for me is that I still need to improve my lighting arrangements. At the moment I have two desk lamps with moderately bright "daylight" bulbs. I'm trying to use the lens at F8 to maintain a reasonable depth of field and, like yourself, finding that the shutter speeds are getting rather slow. Fortunately I have a fairly solid tripod so that vibrations are not too severe, but I found the biggest improvement from suspending a piece of white card over the specimen at an angle to help reflect a little more light into the subject.
Its all still very much work in progress for me - I consider myself a poor photographer - but its great fun, and something I've been wanting to do for a while. Things can only improve...
mal

27th Dec 2011 20:18 UTCStephen C. Blyskal Expert
You don't mention the f-stop that you used in these photos. You should use at least f11, and possibly as small an aperture as f22. Also, what are you using to trip the shutter? You need a remote release to prevent the kind of vibration your finger would induce. Some people lock up the mirror, but that may not be possible on your camera.
That said, these photos look pretty good, especially the last one. Are you using manual focus? I hope so, as it is more reliable for macro work.
Welcome to the world of mineral photography. There is a lot to learn about how to do it, and many different ways as you'll find out. The most important advice I can give you is understand the lighting you are using, and balance the color temperature your camera is recording against the light you are using. That will give you the most true color. Also, if you shoot RAW you can adjust color balance in your processing program. With jpg you don't have that option.
Hope this advice helps. PM me with questions as you do more.
27th Dec 2011 20:31 UTCRobert Simonoff
The details that I have on the picture are:
Camera Model: Canon EOS REBEL T1i
Exposure Time: 8/10
F Number: 10/1
ISO Speed: 100
I am not 100% sure what the metadata means by F number, but I thought I used either F11 or F16. the lens doesn't allow the camera to go further than F16.
The focus process is a learning experience as well. The lens has no auto-focus option. Instead I mounted it on a novaflex macro rail. Got the magnification I wanted then moved in/out to focus. I can't reliably use the view finder, so have to turn on the camera's display on the back panel, magnify to 5x (a feature of the camera) and focus as best I can.
I do not have a remote release wire, but instead I set the timer for 2 seconds. I push the button, stop moving (hold my breathe even), and wait. The camera seems to stop shaking enough after the 2 seconds. I do use mirror lockup to further reduce vibrations.
I did shoot JPG (forgot to switch to RAW), but it seems that the Camera Raw in CES 5 has a white balance option. You just select the white patch on the "white card" and synchronize it with all other pictures at once. The color balance has been a bit of a trick, and I still don't have it down. For regular photograph, I use a plastic "white card", then I can balance all pictures at once using RAW. But at higher magnification, even the white card has slightly different shades of white :-)
So far, I think I need to figure out lighting. I am considering getting camera mounted flash(es), but am not sure. I would need to use either a ring light or a flash on some sort of extension arm. I even tried to make reflecting cards (index card covered with aluminium foil supported by baked clay stands). I would really love to see how people are taking macro pictures - lighting set up etc.
Thanks
Bob

27th Dec 2011 23:47 UTCEugene & Sharon Cisneros Expert
However, with macro lenses, this is complicated by the fact that the Effective Aperture = (Aperture Setting) + (Aperture Setting x Magnification) . So your lens set to 1X and f/2.8 will actually be operating at an effective f/5.6. If it looks dark when you are set to f/16, that's because the effective f-number is f/96!
For a review of the lens, see Canon MP 65mm review
Gene
28th Dec 2011 01:26 UTCRobert Simonoff
Bob
28th Dec 2011 03:34 UTCRobert Simonoff

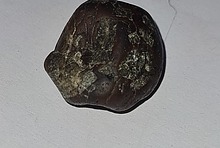
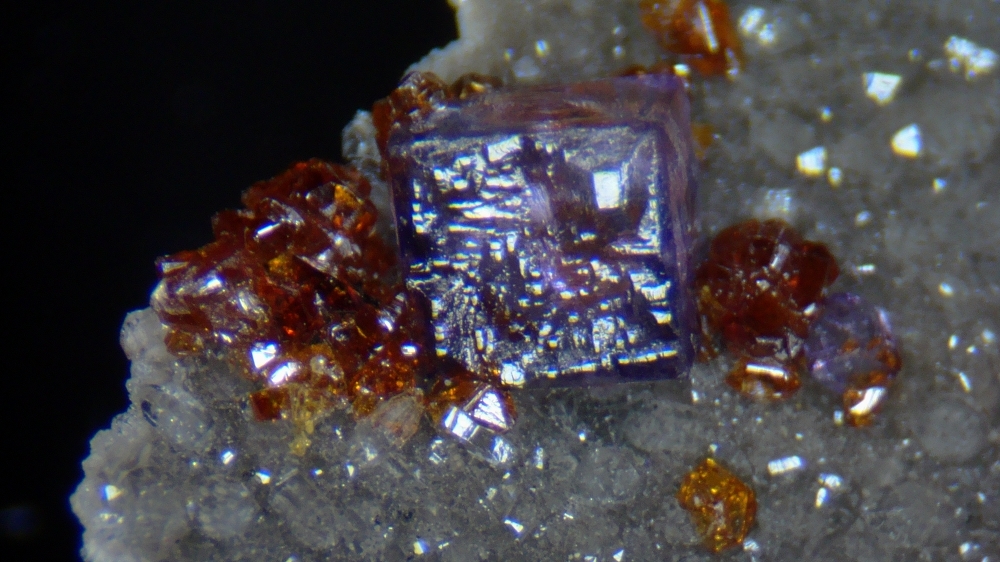
The following pictures are a sequence where each is a closer zoom than the previous. No cropping has been done. The place being magnified is the small cresent of copper near the top.

The 1:1 setting. FOV approx 2.2 cm

The 2:1 setting. FOV approx 1 cm>

The 3:1 setting. FOV approx 5 mm
The 4:1 setting. FOV approx 3 mm

The 5:1 setting. FOV approx 1 mm
Finally, I have 2 more pictures of the small copper inclusions shown at about 9 o'clock (exactly left of center near the edge) in the original picture.
FOV approx 5 mm>
FOV approx 3 mm
Thanks for looking
Bob
28th Dec 2011 05:06 UTCKeith Compton 🌟 Manager
Great results and best wishes. Looks like you are getting off to a great start - nice pics.
Not sure ... but I think that the field of view in the last pic is more like 8mm to 10mm - only basing this on the proportion shown in the pic to the original.
Never seen one of those Copper/Datolites close up in real life - very nice.
Cheers
28th Dec 2011 06:02 UTCWayne Corwin
28th Dec 2011 06:20 UTCDouglas Merson 🌟 Expert
Doug

28th Dec 2011 08:24 UTCAndrew Tuma Expert
I basically run two lens sizes on my Nikon, 50mm for full specimens, good depth of field and I can get nice contrasts; and a 105m macro for closer work. (i also use the 105 macro for other stuff - flowers and insects and is just perfect for portraits - what it was designed for). To get depth of field I am using stacking software, slowly getting better but a few tricks to learn yet. (both lens cost more than the body of the camera)
I learnt very quickly as explained by a few others, high F stops dont help, more depth but poor resolution - so i keep between around F8
Mal, the importance of lighting can not be discounted, I tried a lot of options with desk type lamps etc but until I raided Steve Sorrell and obtained his larger light box I didnt start to get the outcomes I was looking for but I still get a number that are a little too dark. The light box has up to 8 halogen lights on flexi arms, this allows me to vary the lighting to get the right options of light and contrast. Too much light applied poorly can make a specimen too flat.
And suspend a weight on the bottom of the tripod, surprising how much this helps in cleaning up a little of the annoying shakes.
I will never get to the level of a number of the contributors to MINDAT but hey that not what I do this for...it is just really nice to get a representation of a few of my collection.
Andrew
28th Dec 2011 11:55 UTCRobert Simonoff
Keith, at its widest, the piece is 3.2 cm, it is narrower here - the fuill view picture is canted compared to the others by about 45 degrees counter clockwise. I will remeasure, but I did so twice and am guessing that it is close to 3mm +/- 1 mm. Maybe I will take a series of shots of a rules since I am both trying to provide information about the camera as well as learn.
Douglas, you are right and I had forgotten about that mode. I played with it a long time ago and had some trouble with it on our microscope. I guess I had better try it again! Thanks for the reminder!!!!
Andrew can you tell us more about this light box? Maybe a picture too? I think I want to start working on my lighting issues. What are people's thoughts? Ring mounted flash? Dual front mounted flashes? Based on reviews I have seen both work well - the ring light casts no shadow, however. I suspect that could be a problem here. Thoughts?
I also need to work on my set up. It is getting crowded in the area where I need to adjust the mineral's position. I am also worried a little about all the hest the lamps are generating. I can imagine the min tack softening and the piece falling over :-)
Thanks
Bob
29th Dec 2011 02:33 UTCEugene & Sharon Cisneros Expert
The EOS Rebel T1i has an APS-C sensor with dimensions of 22.3mmX14.9mm. The horizontal FOVs should then be.
22.3mm/1 = 22.3mm ---→ For 1X setting
22.3mm/2 = 11.2mm ---→ For 2X setting
22.3mm/3 = 7.43mm ---→ For 3X setting
22.3mm/4 = 5.58mm ---→ For 4X setting
22.3mm/5 = 4.46mm ---→ For 5X setting
This agrees for the 1X and 2X images. The others are off a bit, for some unknown reason. So, I printed out the 1X and the 5X image and measured the distance between the same two dots on each image. At 1X the dots were 11mm apart and at 5X the dots were 55mm apart. The difference in size between the 1X and 5X images is 55mm/11mm = 5. So, the range of the lens checks out and is a factor of 5 to 1. That leads me to believe that the 5X setting cannot yield a 1mm FOV and that the above tabulation is correct.
Gene
Gene
29th Dec 2011 02:35 UTCEugene & Sharon Cisneros Expert
I got so interested in the numbers that I failed to mention, that is a very nice Xmas present!
Gene
29th Dec 2011 03:11 UTCRobert Simonoff
1x = 22+ mm
2x = 11+ mm
3x = 7+ mm
4x = 5.5 mm
5x = 4.2 mm (I really can't call it 4.5, but what's 3/10 of a mm)
So, I guess I was wrong with my measurements of the datolite, sorry everyone! Thanks for the cross check Gene! Why, if the sensor is 23.3mmX14.9mm would 1x lose a mm and become a 22.3 FOV? The ruler says 22 or so, therefore I can't disagree, just puzzled.
I will fix the FOVs in the picture, but not the message above (else future readers will get confused about this discussion)
Thanks Again!!!
Bob
29th Dec 2011 03:29 UTCEugene & Sharon Cisneros Expert
My fingers didn't type what my head was saying. The 23.3mm, in the first line of my post, should say 22.3mm, like in the calculations. It has been corrected. There is nothing like an error, when trying to correct an error, to further confuse. :-)
I think that you are going to have a lot of fun with that lens!
Gene
29th Dec 2011 03:36 UTCRobert Simonoff
29th Dec 2011 06:46 UTCKeith Compton 🌟 Manager
You should get a copy of Scovill's photography book from The Min Record or Min Research Co - it will give you a great deal of camera hints, irrespective of the camera being used.
And remember at least with digital you can take hundreds of pics until you get it right without costing an arm or a leg if you were using film.
Happy snapping
Cheers
29th Dec 2011 07:04 UTCAndrew Tuma Expert

The light box i was speaking about is as follows. Constructed from light metal box frame and white acrylic side sheeting. The bottom/back is one sheet on a curve from the top edge to the bottom front edge. This give a graduated white to grey background and I use a piece of black cardboard for a dark background. The lights are run of a singe big transformer where I can turn on as many or as few lights. I am not sure where Steve got it from but I think the light box is a commercial product...
cheers Andrew

30th Dec 2011 05:08 UTCSteve Sorrell Expert

The one I use now is a commercial product and folds up neatly into a unit a bit bigger than a briefcase (see photo). It also sits on our dining room table nicely, much to the annoyance of the boss!
You only need the big one if you collect Andrew-sized rocks!
Bob - 1 question - why sharpen 20%? That seems a bit extreme.
Regards
Steve
30th Dec 2011 17:12 UTCRobert Simonoff
I was going into proper photoshopping after I got the basics down. Right now I am battling with what appears to be very small bits of dirt somewhere. They only show up under 4:1 and 5:1 but they do show up as black dots. Now to find and eliminate them so I can try other ideas I have.
Steve what do you do for sharpening? I see there I not just a percentage but radius as well.
Bob
30th Dec 2011 19:46 UTCJeff Weissman Expert
those small bits of dirt are probably dust on the sensor - I found that a good quality sensor cleaner, and inspection of the sensor to verify cleanliness, with a microscope, is needed to get rid of them. They are mostly a problem at highest magnifications

30th Dec 2011 21:24 UTCJolyon Ralph Founder
Just to be clear. That's NEVER.
Why? Because it just makes a nightmare mess with the compression artefacts. It looks horrid.
Your camera will automatically run a sharpening filter (to compensate for the filters in the camera and the way the pixels are built from separate R, G and B elements) if you are saving as JPEG, critically this is done before the image is compressed as JPEG.
Be happy with the end results and never mess around with sharpening. Never.
Thank you :)
If your camera saves as RAW files, then you may be able to use sharpening, but ONLY if you turn off the automatic sharpening option when you import it into Adobe Raw - You can then do sharpening on the image when it's converted to RGB inside Photoshop, Unsharp Mask is often used for this.
However.... in my experience converting to RGB and then doing Unsharp Mask doesn't usually work as well as letting Photoshop do the sharpening in the Adobe Raw loader - which is done before it is converted to RGB.
So. Unless you're an advanced Photoshop and Digital Image wizard who knows what they're doing with raw images, please avoid using sharpening functions at all!
Many people think a sharpened image looks "nicer". In fact, it just looks artificial. Because it is.
Jolyon
30th Dec 2011 22:53 UTCRobert Simonoff

Here is a new shot with a FOV of about 3mm of a Red Cloud Wulfenite. No sharpening was done!
I think I should work on the micromount a bit. Some of the matrix is obscuring my ability to get a full shot. But I would be interested in peoples comments - how do I improve?
Thanks
Bob
30th Dec 2011 23:24 UTCSteve Sorrell Expert
Also, take a copy of this shot and sharpen, then look at the two images side by side. You should be able to see what Jolyon wrote about.
I don't fully agree that you should never do anything, but look at the results before you decide what to keep. A little unsharpening can be beneficial and still look natural. But try it on a copy, always keep the original. Here's a quick shot taken this morning of an Elmwood fluorite with sphalerite. The first as is, the second with a slight unsharpening. I use Sagelight for most photo editing. There is a free version (Lightbox) with very basic capability. Sagelight is only in the $50-60 range though and gives me all the capabilities I want.

Regards
Steve
30th Dec 2011 23:44 UTCEugene & Sharon Cisneros Expert
That's a nice image! Am I correct in assuming that it is a 3/5 crop of the original? The only improvement that I can suggest is to either shoot at a different angle or get rid of some of the obscuring matrix. The latter may end up being a disaster, so I only mentioned it and did not recommend it.
Steve,
Why would you want to unsharpen you image?
Cheers,
Gene
30th Dec 2011 23:45 UTCJolyon Ralph Founder
Your second image shows horrible JPEG artifact sharpening. I much prefer the first! The background quartz is unnatural on the second.
30th Dec 2011 23:50 UTCRobert Simonoff
As fa as the angle, I played for awhile and the above is an improvement :-) The crystal is in a slight indentation in the matrix. If I angle upward enough, I lose depth of field. The loss will cause me to play with the f stop or iso, which I think will degrade the image in a different way. I think one of my first lessons has to do with each improvement also costing something. Choose which evil you want.
Thanks Steve and Gene!
Bob
31st Dec 2011 00:24 UTCSteve Sorrell Expert
Gene - I read somewhere a while back that unsharpening is preferable to sharpening. Not that I had a choice. The menu option is listed as Sharpen (Unsharp Mask), and when you undo, shows as Undo Blur Image.
Regards
Steve
31st Dec 2011 02:39 UTCKeith Compton 🌟 Manager
Unless you don't have Tuesdays on your calendar then as J said - Never on Tuesdays either!!.
Better to do it if you only sharpen on the third full moon in the month (i.e the one that occurs after the Blue Moon) !!!:-D
Cheers and Happy New Year - think I'll start early !! :)-D
Cheers
31st Dec 2011 18:01 UTCEugene & Sharon Cisneros Expert
You may be able to go up an f-stop or so without any/much degradation of the image. Some degradation may be apparent at the pixel level but may not be bad at all in reduced images that are suitable for the internet. Still, that will only give an incremental increase in DOF. You may want to consider the multi-focus technique, which can synthesize any amount of DOF required. You are correct that every improvement incurs a cost, or tradeoff. Multi-focus comes at the expense of technical complexity and time invested to make a better image. So far, I still haven't had a free lunch...have you? :-S
Gene
31st Dec 2011 18:12 UTCRobert Simonoff
When I stack with this lens, the black dots become long black lines. These are much harder for me to edit out than the few black dots which I currently am editing out when I take pics. So, I need to wait to hear back from Canon to see what the accepted method is of lens cleaning. Since it is brand new, I don't want to do anything that will void my ability to return the lens if there is a problem.
Thanks
Bob
31st Dec 2011 19:26 UTCEugene & Sharon Cisneros Expert
I can't explain why your black spots move with the different lenses. More thought required on this one. However, I find it hard to believe that the spots are caused by anything on the lens. Nothing that is on the lens should be in focus at the focal plane. In fact, if you put an obstruction in front of the lens, the result should be a little less light and resolution. But, you will not see an image of the obstruction. For example, consider a catadioptric lens, with a large central obstruction.
Gene
31st Dec 2011 22:59 UTCAnonymous User
If you can tell an image is “sharpened”, then it's been done wrong.
There's a good argument for something around 80% at 0.8 pixel radius unsharp mask, to put back some of what the low-pass filter in the camera, and the MTF curve of the lens, took out. You really do get to see more detail – if the lens is up to it.
Also, if you use a large radius, say 30 pixels, and a much lower degree of sharpening, perhaps 15%, it can do a lot to clear down the "haze" you often get in the shadows, from stacking.
Use Smart Sharpen for "Lens" blur not "Gaussian" blur and "Less precise" to help avoid any fringeing from sharpening - something I hate to see.
Best quality Jpegs don't have any artefacts to get worse in sharpening. Canon's Jpegs (best on eg Rebels) aren't all quite that good, but you have to look really hard to see it. (100% on screen at least). Nikon's algorithm is a bit better - no sign of anything. (I use both and am not religious about them. They each have "best" points.)
Having said all that you need a top lens to get anywhere near sharpness at a few pixels level, at high magnification. If you're only looking at ( or showing, as here) the image 1000 or 2000 pixels wide then you're using what, about 2 megapixels worth! At that size, most that sharpening is really doing on a typical image is altering contrast. Anything from jpeg compression of the original size will be long gone if the image has been shrunk by 4-5 times.
The "Spots" across your stacked image are from dust on the sensor. They do move around! (Spots on the lens lose you contrast, is all, usually.) "Dust bunnies" are a major problem with stacking (I have a 650 image stack running at the moment, and I forgot to check the sensor first... :-X ) If you look close you'll possibly see one spot per exposure, per trail, and probably in a curve as the stacking aligner shifted the image about.
Some stacking algorithms (including the most useful) are worse than others for dust trails.
At 5x magnification your lens, if used at a marked f/4, is effectively f/24. Any smaller and you'll just get blur from diffraction, on anything like an APS 15MP sensor. You see dust spots at small effective apertures - or very small effective apertures. Take a low iso photo of a neutral blank thing (out of focus is good) at your smallest aperture, shutter timed as long as it takes to get a light/mid grey overall. You can move the camera about to make the exposure even across the frame. A marked f/32, say. (If you want to be nasty to yourself, a marked f/32 on a long bellows!!). Then look at the image at pixels level, and you'll probably be horrified. I was. (If the camera's newish, and the dust doesn't blow off, it's likely to be oil spots - I would (now) send it back for cleaning if it happened again to me.)
They only show at tiny apertures because you need a sharp "shadow" of the dust ( which is on the sensor's filter) on the sensor itself, behind it.
Oh – you don’t need to use a Canon "tethered" to get the Electronic Front Shutter Curtain. It's easiest really to just go from Live View. (It doesn’t work either way on a 60D, by the way, they still shake!!)
I've reverted to flash though, with wooden floors I get sharper pictures that way, when using high magnifications. On my Nikons with jack-hammer full frame mirror, that needs Mirror Lockup as well :).
Oh - a SPLENDID Christmas present, by the way, one reason for going "Canon"! Beatable, but not by much, and only with a lot of money and more than one lens.
2nd Jan 2012 03:44 UTCDouglas Merson 🌟 Expert
Doug
2nd Jan 2012 11:14 UTCAnonymous User
I'd be interested to see how the new 1DX(?) does it.
If you Aren't using Live View then in both (Canon Nikon) cases it's worth using mirror lockup of course.
There's no "silent mode" equivalent on any Nikon, On the Canons, you have different methods on different models, to invoke it. Going from Live View is easier than digging into the Custom Settings - depending on the camera somewhat. LV locks the mirror AS WELL in effect.
Perhaps surprisingly, if you're using flash at high magnification, then it is also worth using mirror lockup - depends on the camera and the flash duration. With a Full Frame (Canon or Nikon) and a full flash at around 1000th, it's easy to show a difference. Smaller format and flash operating at 1/32nd power, (1/32,000th of a second) then I would very much doubt it would be possible to see anything much!
You can avoid the shutter first curtain vibration when using flash, (C or N) by using Rear Curtain Sync for the flash, in a darkened room, with say a 1 second exposure doing nothing, then the flash at the end. This is the only way on a Canon too - you can't use Flash at all with any Electronic First Shutter Curtain mode, on any Canon.
Simply using Live View on a Canon then, means using long exposures. If you take the image out to a larger screen (tethered, or a separate HDMI monitor), expand the view, and can't see ANY vibration, all is well, But that depends on the building you're in and the floor you're on and how rigid your "rig" is. Nothing is ever 100% still!
Canon makes things slightly more un-straightforward in other ways too:- you can't use rear-curtain sync with a non Canon dedicated flash, and if you use the Infra Red Remote, Canon won't let you have Mirror Lockup!
Nikon don't have those (particular) interactions so life is simpler - though some models may differ from mine.
2nd Jan 2012 19:17 UTCJeff Weissman Expert
You can avoid the shutter first curtain vibration when using flash, (C or N) by using Rear Curtain Sync for the flash, in a darkened room, with say a 1 second exposure doing nothing, then the flash at the end. This is the only way on a Canon too - you can't use Flash at all with any Electronic First Shutter Curtain mode, on any Canon.
I noticed a notable improvement in sharpness after switching to this method, but I am using 2 second exposure just to allow all vibrations to dampen out. The key is a camera and flash unit that allows for manual mode and second curtain sync on the flash.
2nd Jan 2012 22:44 UTCAnonymous User
Is this going from Live view (Car Crash) mode with front curtain sync, or
from normal view, front surtain sync?
What about the flash exposure (percentage)?
Interesting, I thought it might only be on the ones with the barn doors for mirrors.
Most vibrations, as seen in a few tests published, die away in the first tenth second or so. One second seems to be OK, I haven't done careful tests. Maybe you're right, 2 seconds would be better.
I do worry about this sort of thing ... Are we being paranoid enough??
I think apologies are due to Steve Sorell - this topic had been thoroughly hijacked!
Ok, Steve did you know that if you can find a few adapters to put a teleconverter ( which is of course a negative lens) on the front of your MPE-65, you can get it to focus at much lower magnification than 1:1. Google for "Lord V" and his observations on that.
2nd Jan 2012 23:57 UTCSteve Sorrell Expert
Regards
Steve
3rd Jan 2012 00:03 UTCAnonymous User
3rd Jan 2012 02:38 UTCJeff Weissman Expert
Second curtain sync works well on my still functional Canon 10D, and 2 seconds over 1 second exposure time is just being paranoid. I am also using Canon MT-24EX dual macro flash, but using off-camera flash mounts to better position the flash heads.
3rd Jan 2012 03:55 UTCRobert Simonoff

I took these pictures using the rear LCD as a way of visualizing the crystals. I used the 5x magnification of the LCD to do fine focusing. I then took the pictures while in the LCD mode, so I think I avoided the shutter vibrations.

FOV about 4 mm

FOV about 4 mm

FOV about 3 mm
I am interested in feedback about how to improve. One things I am noticing right off is that the 3 mm shot is not as sharp as I would like. I suspect this is because of the exposure time and vibrations. I did take the pictures with a 2 second delay to dampen any vibrations from pushing the camera's shutter button. I know that eventually I should hook up my laptop and do it that way, but to do so will require rearranging my room.
I also know the black spots are in the pictures, I left them in deliberately so you could see them :-) I ordered Giotto's "red rocket," which seems to be recommended by several web sites. Hopefully that will resolve the problem.
Thanks!
Bob
3rd Jan 2012 05:38 UTCRobert Simonoff


FOV about 4mm

FOV about 4mm
The photoshopping I did was limited to color balancing (based on a white card) and cropping.
Thanks
Bob


Mindat.org is an outreach project of the Hudson Institute of Mineralogy, a 501(c)(3) not-for-profit organization.
Copyright © mindat.org and the Hudson Institute of Mineralogy 1993-2024, except where stated. Most political location boundaries are © OpenStreetMap contributors. Mindat.org relies on the contributions of thousands of members and supporters. Founded in 2000 by Jolyon Ralph.
Privacy Policy - Terms & Conditions - Contact Us / DMCA issues - Report a bug/vulnerability Current server date and time: April 18, 2024 11:53:42