Home PageAbout MindatThe Mindat ManualHistory of MindatCopyright StatusWho We AreContact UsAdvertise on Mindat
Donate to MindatCorporate SponsorshipSponsor a PageSponsored PagesMindat AdvertisersAdvertise on Mindat
Learning CenterWhat is a mineral?The most common minerals on earthInformation for EducatorsMindat ArticlesThe ElementsThe Rock H. Currier Digital LibraryGeologic Time
Minerals by PropertiesMinerals by ChemistryAdvanced Locality SearchRandom MineralRandom LocalitySearch by minIDLocalities Near MeSearch ArticlesSearch GlossaryMore Search Options
The Mindat ManualAdd a New PhotoRate PhotosLocality Edit ReportCoordinate Completion ReportAdd Glossary Item
Mining CompaniesStatisticsUsersMineral MuseumsClubs & OrganizationsMineral Shows & EventsThe Mindat DirectoryDevice SettingsThe Mineral Quiz
Photo SearchPhoto GalleriesSearch by ColorNew Photos TodayNew Photos YesterdayMembers' Photo GalleriesPast Photo of the Day GalleryPhotography
╳Discussions
💬 Home🔎 Search📅 LatestGroups
EducationOpen discussion area.Fakes & FraudsOpen discussion area.Field CollectingOpen discussion area.FossilsOpen discussion area.Gems and GemologyOpen discussion area.GeneralOpen discussion area.How to ContributeOpen discussion area.Identity HelpOpen discussion area.Improving Mindat.orgOpen discussion area.LocalitiesOpen discussion area.Lost and Stolen SpecimensOpen discussion area.MarketplaceOpen discussion area.MeteoritesOpen discussion area.Mindat ProductsOpen discussion area.Mineral ExchangesOpen discussion area.Mineral PhotographyOpen discussion area.Mineral ShowsOpen discussion area.Mineralogical ClassificationOpen discussion area.Mineralogy CourseOpen discussion area.MineralsOpen discussion area.Minerals and MuseumsOpen discussion area.PhotosOpen discussion area.Techniques for CollectorsOpen discussion area.The Rock H. Currier Digital LibraryOpen discussion area.UV MineralsOpen discussion area.Recent Images in Discussions


Mineral PhotographyPhotographing with glass base
17th Jun 2015 20:21 UTCMatt Courville
In my attempt (journey really) to redeem myself on taking poor mineral photos, I have a quick question. I see that many of the best photographs seem to have used a glass base. Is this recommended, and what purpose does it serve?
I'm not fond of the reflections it creates, but needed to know if it was a trade-off for a better photo.
Much appreciated,
Matt
17th Jun 2015 20:27 UTCOwen Melfyn Lewis
17th Jun 2015 20:36 UTCMatt Courville

17th Jun 2015 20:40 UTCBob Harman
17th Jun 2015 21:33 UTCMatt Courville

17th Jun 2015 21:39 UTCChris Stefano Expert

17th Jun 2015 21:40 UTCColleen Thomson Expert
are you actually asking about the 'glass base' (ie: as Bob stated- an acryllic 'base' for mounting a specimen on for display or to help position it correctly to photograph) or are you asking about the use of a glass base as the background upon which the specimen is photographed? :-S
17th Jun 2015 21:47 UTCEd Clopton 🌟 Expert
Perhaps someone who has actually used the technique can tell us more about it.

17th Jun 2015 22:13 UTCDavid Von Bargen Manager
17th Jun 2015 22:44 UTCAmir C. Akhavan Expert

A good background creates an "environment" that emphasizes the shape and color(s) of a specimen without being distracting itself.
And a glass base gives you more flexibility in controlling this background/environment.
As Ed said, you can exchange backgrounds without moving the specimen, leave more or less space between the specimen and the background to blur or even "remove" the shadow.
You can create spots of light in the background at some distance without illuminating the specimen. It's easier to create smooth transitions from bright to dark with the background at some distance. Specimens that hover in space do look odd, and the reflections of the specimens on the glass actually help to make it look more "normal".
And not to be forgotten: You can still put whatever you want on the glass, even an ugly carpet. You don't lose much using a glass base.
There are two potential drawbacks of a glass base:
1. Its reflections illuminate the specimen, too, and depending on the position of the lamps, sometimes much more than a white cardboard would. In the beginning I was very worried about this and did not use a glass base and instead added an artificial background in post.
Later I found it to be much less of a problem than I had thought. In fact, when I did not use a glass base, I always had to add some illumination from below, otherwise the specimen would be too dark at its base.
2. If you make use of reflections, the specimens must be placed in the correct position on the glass, otherwise reflections will be oblique, and many specimens need a stand or another extra support to get them in the right - and unfortunately often instable - position. You also have to make up your mind on how to position the specimen before you put it on the glass, you can't rotate it freely in all directions.
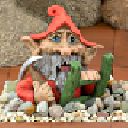
Three examples, all done with the same setup, all with a glass base (the upper part of all backgrounds is still artificial/altered):
Plain window glass with "normal" reflections, blue background 10 cm below it.
Roughened non glare window glass (no special non glare glass) with blue backgrund 10 cm below it. One can really see the glass in that photo, it is nevertheless not distracting

Plain window glass like in the first shot with a white background moved up to about 5 mm from the specimen, resulting in a soft shadow.

17th Jun 2015 23:28 UTCSusan Robinson

18th Jun 2015 00:26 UTCRonald J. Pellar Expert
18th Jun 2015 02:04 UTCKeith Compton 🌟 Manager
The glass is simply raised (positioned) above the background colour (paper or cloth).
Best glass is non-reflective glass - available from any picture framer or glass supply house.
It is simply a way of removing, or at least reducing, reflections and glare near the base of the specimen.
The only downside of glass is that it does scratch so you may want to attach "tiny" bits of tac to the base of the specimen where contact is made with the glass to help avoid direct contact with the glass. Of course this must be "invisible" from the front view.
Suggest that you have a look at Scovil's book on mineral photography for more hints and tips.
Cheers
18th Jun 2015 02:16 UTCKelly Nash 🌟 Expert

18th Jun 2015 04:07 UTCMartin Rich Expert
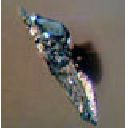
Some examples:
Double mirroring depends of the glass plate (not very aesthetic):

I made a special preparation of the glass, I have only a single mirroring:

The background of all my photos here on mindat is natural, only some photos have a generated background with Gimp.
18th Jun 2015 07:47 UTCHenri Koskinen Expert
http://www.photomacrography.net/forum/viewtopic.php?t=27551
Another very effective way to manipulate these reflections is to use a polarizing filter. In the above set of seed photos I used a linear polarizer in the first photo to kill all secondary reflections. This gives also control of the bacground.
Henri
18th Jun 2015 13:19 UTCMatt Courville
Matt
20th Oct 2015 12:36 UTCZbynek Burival Expert
I also use it for creating solid black background without any gradient or reflections, which is otherwise very difficult to create. But you have to use circular polarizer filter, it doesnt work without it. Here is my way to do it http://www.photographingminerals.com/how-to-make-solid-black-background/
There are various types of glass with sand blated surface, etched surface, matte glass etc. - I still use only common flat glossy glass plate. If I need black glass, I simply use a glossy black color spray on one side of the glass.
20th Oct 2015 16:55 UTCMatt Courville
25th Oct 2015 21:04 UTCTim Jokela Jr
I also love mug shots.
To my mind, it's a question of simply, quickly, and accurately portraying a mineral specimen, rather than producing a pretty photograph.
14th Jan 2016 19:52 UTCJames Ali
14th Jan 2016 20:14 UTCJames Ali
In regard to your question.
I, as a commercial / editorial, in product / tabletop photographer for several decades, in Chicago, can tell you without a doubt, shooting on glass (on occasions) is a very nice way to light minerals or most any smaller products. (Particularly anything with reflective qualities.)
The reason being is if you're looking for the lighting to continue down the entire length of the subject matter, diffusion material can be taped onto the underneath side of the glass table, (as close to the subject matter as possible). Then, another light head can be directed into that diffusion material, allowing continues lighting, along the subject matter's length.
However, the lens angle has its limitations if you're trying to minimize the product's reflection into the glass, particularly since most minerals look their best when shot "straight-on".
So, unfortunately, it's a trade off.
A polarizing filter can completely eliminate that reflection (within a certain lens angle). But, when shooting straight-on, you'll need to photoshop the background.
Hope this helps.
Good Luck,
James
P.S I don't mind reveling this information to you as I'm no longer shooting in the competitive market and only shooting for my own Rock Shop. Sorry to those that wished I hadn't given out this knowledge. DavesRockShop.com
15th Jan 2016 14:10 UTCMatt Courville


Mindat.org is an outreach project of the Hudson Institute of Mineralogy, a 501(c)(3) not-for-profit organization.
Copyright © mindat.org and the Hudson Institute of Mineralogy 1993-2024, except where stated. Most political location boundaries are © OpenStreetMap contributors. Mindat.org relies on the contributions of thousands of members and supporters. Founded in 2000 by Jolyon Ralph.
Privacy Policy - Terms & Conditions - Contact Us / DMCA issues - Report a bug/vulnerability Current server date and time: April 20, 2024 02:10:31
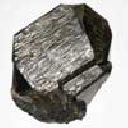
Kullu District, Himachal Pradesh, India