Home PageAbout MindatThe Mindat ManualHistory of MindatCopyright StatusWho We AreContact UsAdvertise on Mindat
Donate to MindatCorporate SponsorshipSponsor a PageSponsored PagesMindat AdvertisersAdvertise on Mindat
Learning CenterWhat is a mineral?The most common minerals on earthInformation for EducatorsMindat ArticlesThe ElementsThe Rock H. Currier Digital LibraryGeologic Time
Minerals by PropertiesMinerals by ChemistryAdvanced Locality SearchRandom MineralRandom LocalitySearch by minIDLocalities Near MeSearch ArticlesSearch GlossaryMore Search Options
The Mindat ManualAdd a New PhotoRate PhotosLocality Edit ReportCoordinate Completion ReportAdd Glossary Item
Mining CompaniesStatisticsUsersMineral MuseumsClubs & OrganizationsMineral Shows & EventsThe Mindat DirectoryDevice SettingsThe Mineral Quiz
Photo SearchPhoto GalleriesSearch by ColorNew Photos TodayNew Photos YesterdayMembers' Photo GalleriesPast Photo of the Day GalleryPhotography
╳Discussions
💬 Home🔎 Search📅 LatestGroups
EducationOpen discussion area.Fakes & FraudsOpen discussion area.Field CollectingOpen discussion area.FossilsOpen discussion area.Gems and GemologyOpen discussion area.GeneralOpen discussion area.How to ContributeOpen discussion area.Identity HelpOpen discussion area.Improving Mindat.orgOpen discussion area.LocalitiesOpen discussion area.Lost and Stolen SpecimensOpen discussion area.MarketplaceOpen discussion area.MeteoritesOpen discussion area.Mindat ProductsOpen discussion area.Mineral ExchangesOpen discussion area.Mineral PhotographyOpen discussion area.Mineral ShowsOpen discussion area.Mineralogical ClassificationOpen discussion area.Mineralogy CourseOpen discussion area.MineralsOpen discussion area.Minerals and MuseumsOpen discussion area.PhotosOpen discussion area.Techniques for CollectorsOpen discussion area.The Rock H. Currier Digital LibraryOpen discussion area.UV MineralsOpen discussion area.Recent Images in Discussions


Mineral PhotographyRequesting some advice/tips

29th Jul 2015 14:23 UTCMatt Courville
I've posted a couple of messages a little while back which gave me some good pointers into photographing my minerals, but I seem to be still having issues. Hopefully someone could fill in the gaps for me, because my combinations of settings are not nearly as good as I had expected.
Tripod, contained photographing area, proper UV lighting has been used. Manual focus and 10 second delay was also attempted.
The variables:
ISO_____?
Aperature______?
Shutter speed_______?
Macro or Super Macro?
If anyone would like to give me examples of what their common settings are I believe that I'd be able to narrow-down what is off. I'm have two quite good Canon powershot cameras with one slightly better than the other, and have the common setting options on them.
Thanks,
Matt

1st Aug 2015 09:42 UTCHenri Koskinen Expert
Your questions are very basic and about photography in general. That's propably the reason you haven't received any answers to your post.
There is an enormous amount of educational online material answering and explaining basic concepts of photography. You need to understand the concepts of shutter speed, aperture and ISO. Once you grasp what these mean and how they interact you have the answers to your questions also. There is really no short cut here for you and there is no best set of settings.
Optimally you would use smallest possible ISO number (100). If there is a shortage of light you can use higher ISO but the expense you pay is lower quality of the photo.
https://photographylife.com/what-is-iso-in-photography
Aperture is a factor in determining the depth of field in your image.
http://www.cambridgeincolour.com/tutorials/depth-of-field.htm
Shutter speed has to do with motion blurr in you images
https://photographylife.com/what-is-shutter-speed-in-photography
You are using a tripod and shooting in studio where you have the luxury of choosing the lighting. So no need to lower the quality with higher ISO. And no need to compromise your depth of field as you can use as long exposure times as you please. Just take care that you have enough (good quality) light. A very rudimentary rule for your setup could then be this: set ISO 100, next choose an aperture that gives the depth of field that you prefer, and then just choose the shutter speed that yields the best general level of lighting (for the given ISO and aperture).
One more thing. If you are using wrong white balance the result can be really ugly
http://www.cambridgeincolour.com/tutorials/white-balance.htm
Hope this helps,
Henri
p.s. post some photos
1st Aug 2015 12:09 UTCOwen Melfyn Lewis
-------------------------------------------------------
> Tripod, contained photographing area, proper UV
> lighting has been used. Manual focus and 10
> second delay was also attempted.
>
> The variables:
>
> ISO_____?
> Aperature______?
> Shutter speed_______?
> Macro or Super Macro?
>
> If anyone would like to give me examples of what
> their common settings......
Matt,
You are wanting to play match-level golf when using one club only that you borrow from some one else. Forgive me, but It's not the right approach,
Have you tested *your* cameras for noise in the images as you increase your ISO setting? Use a very plain, pastel-shaded subject or maybe part of the page of a book. Whatever, avoid all texture in your subject as its much easier to spot low levels of noise that way. Also, keep the lighting even right across your field of view. This testing is the only way you can determine the range of ISO settings available to you, with your present cameras without any visible deterioration in image quality.
Have you tested *your* cameras for the smallest aperture setting you can use before the diffraction of light at the iris starts for cause your image resolution to fall? This will probably be f/8 or f/11 but doing the test will help you learn how to control your cameras within their limits. To do that you have to find what those limits are. Once you know that setting, always use it for indoors mineral photography - unless you need to *reduce* the depth of field, e.g. to put out of focus some undesirable feature in the specimen you are imaging. This is not cheating BTW, it is doing in the camera what the brain does if the same subject it viewed directly.
Shutter speed. For mineral photography under studio conditions, set your optimum aperture and leave it as the default setting (AV Priority). Determine the correct exposure value for your shot (camera in spot metering mode) and adjust the EV setting and lighting so you get neither burned-out areas (high relectivity) or unwanted black-hole areas in your image. Since you are using a sturdy tripod and the camera is vibration-free, it simply does not matter how slow the shutter speed may have to be. I work quite often at around a 1/2 to 4 sec shutter speed.
What is 'super-macro'? Optical magnification or digital enlargement at the image plane in the camera? Again test both settings and compare image quality. To do that, you need to zoom images of both on screen to see how big you can make them before image quality deteriorates. Also, using a carefully drawn set of horizontal and vertical black lines on white paper as your subject, check for distortion (bowing) of any of the lines on any part of the image.
Or you can just set as some friend or some beginners book suggests - and have learned nothing by doing that. Why be reluctant to experiment? It's simply the best way to learn what can work for you and your set-up, what's a no-no and to improve your skills. But we all need to find our own way...
4th Aug 2015 17:19 UTCMatt Courville
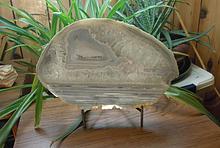
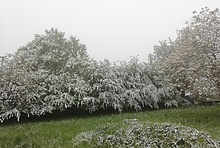
I will try again with the latest advice, and post what I have in case anyone might be interested in constructively criticizing the attempts. I might add that the biggest issue that I was having, seemed to be that the areas at the top of the minerals being photographed all got white and a glared effect...yet when diminishing the light, got less focused and grainy. This also happens when attempting to shoot minerals outside? I'm unsure which part of the camera affects this.('light metering' perhaps?)
Thanks again,
Matt
4th Aug 2015 19:02 UTCOwen Melfyn Lewis
So, put all the articles by wiseacres away and experiment. Find what works for you, your equipment and the specimen you have. Here are some good things to try but the list is by no means exclusive. Be curious - inventive even - and find what works for you.
- When you think you are set, look for the (worst) big, brightest and glittery area(s). Rotate you specimen slightly until (if possible) they either no longer 'burn out' when viewed through the camera - or at least the bad effect is reduced.
- Reduce and diffuse the output of your light(s) - even direct sunlight . There is more than one way of doing this according to the type of light source you have.
......# For direct sunlight, keep it off subject, Instead bounce the sunlight off *matt* white card and from the card to your subject. Try and always use two cards: one as the main light and one as a shadow 'filler-in'.
......# For cool-running benchtop lights (e.g. LED & fibreoptics) diffuse the light beams by 1/2/3 layers of white handkerchief or white kitchen roll held over the lights with elastic bands.
......# For hot incandescents (tungsten filament or quartz halogen used as a direct source), turn the lights *away* from the subject and bounce their light back onto the subject from matt white cards, as for sunlight. Do not place the cards close enough the the lamps to burn!
- Never use the camera in an area-metering mode. Use the finest spot metering that your camera allows and always set the metering spot over the biggest area of potential burnout you have. Areas that are then too dark can be rectified, both by the use of 'fill' in lighting and also (to a remarkable extent) in post camera processing of an image in a good image manipulation programme, Adobe Elements.
If at first you don't succeed, keep trying! There's not an honest person here who will not admit to having problems with burn-out from time to time. There is no 'book-answer' - only techniques such as the above to deal with the issue when it arises. You have to find your own way.
4th Aug 2015 19:21 UTCFrank Craig
I have tried to do "macro" photography using my Powershot G12 (which I guess is canon's "pro-level" point-and-shoot) - there are limitations to these kinds of camera.
First, as mentioned previously, set ISO to 100. Second, set aperture priority (A) since you don't have to worry about shutter speed. Use the smallest aperture, which is f/8 on mine. Third, set single point auto-focus (usually center spot) - do not try to use manual focus. You can always focus on what you want and then move the sample. Set your lens to about 50mm (or less). Make sure you are in "macro" mode (the flower). I would also change your lighting to daylight balanced or incandescent bulbs.
Now for the limitations, hopefully you're not trying to photograph anything smaller than about 4 inches (fist size) - that's the big limitation. These cameras were not designed for true macro photography - An aperture of f/8 is not nearly small enough for the depth-of-field you want (f/16 or, preferably, smaller) and you have a working distance on the order 10 inches which is not really good enough for true macro work (BTW - never use digital zoom to try to "get closer"). Even at ISO 100, don't think you can crop later - it does affect quality. Always try fill the frame with what you are photographing.
Now, having said all the bad things, let me say that the the canon power-shot (G) series is a very capable camera as long as you know the limitations and don't expect too much (of course, I don't know which model you are using, but this goes for all P/S) like museum quality 20X30 images. My suggestion would be to experiment and determine the limitations of your camera, and go from there.
Hopefully, that helps
Frank
6th Aug 2015 22:29 UTCMatt Courville

Thanks for the help and any further tips will certainly be appreciated.
Matt

6th Aug 2015 23:37 UTCOwen Melfyn Lewis
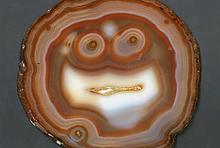
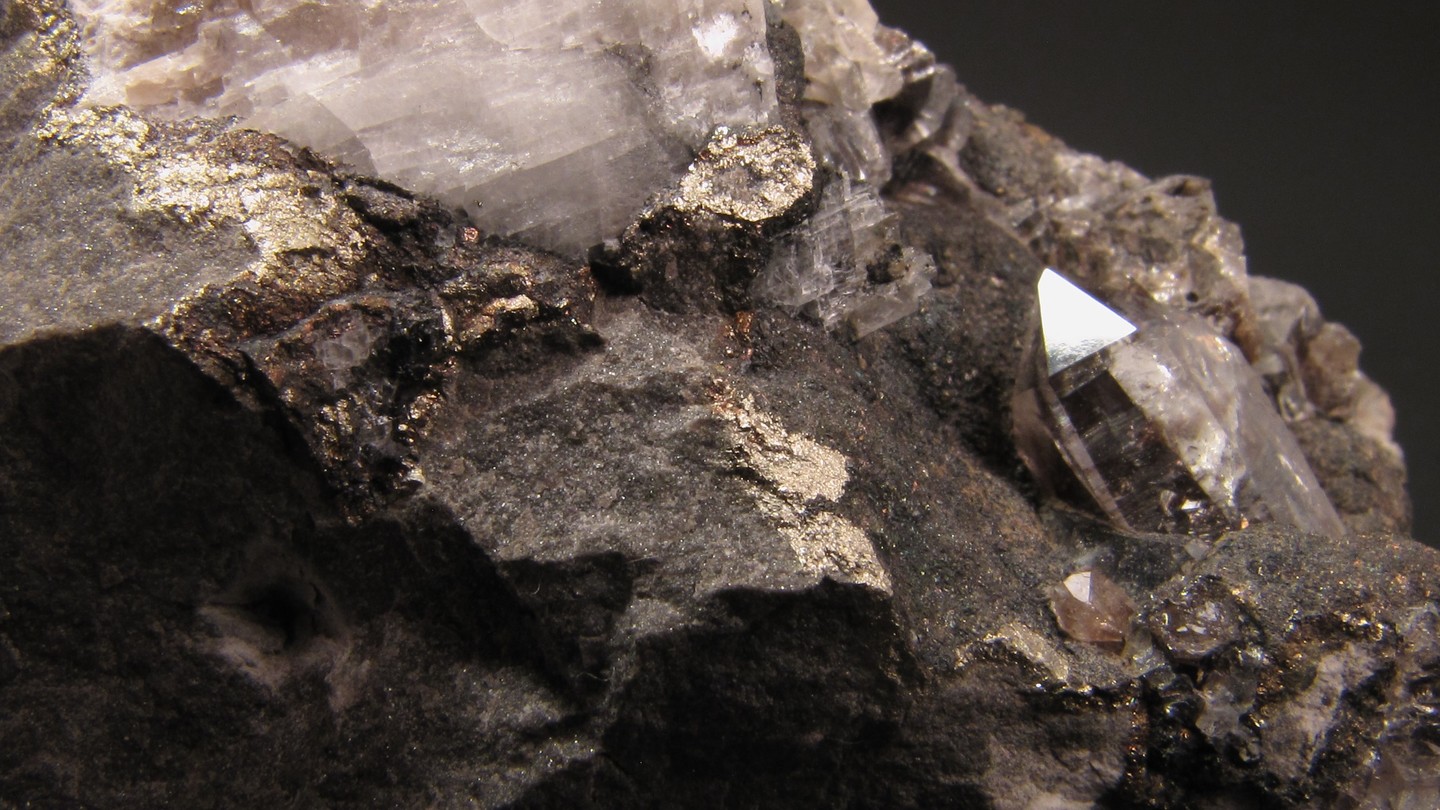
Interesting point in the third but, you have a classic case of burn-out on one face of the pyramidal termination, complete with colour aberration to the left and right. And that's the only area of burn-out.So a slight rotation of the specimen to the left or right of the lens-to-specimen axis should be all that is necessary to remove that unwanted effect.
7th Aug 2015 03:37 UTCMatt Courville
Matt
10th Aug 2015 20:54 UTCFlorian Baur
I truly underestimated that the majority of picture posters worked quite hard on their photography.
This was true for me, too. I knew it wasn't too easy, but still didn't think that especially microphotography takes so much technical effort. My biggest problem so far is color - I have many U-minerals with vivid colors that are hard to get right in the picture. I have a Francevillite that always looks plain orange while in reality it's a more reddísh and strong.
Anway, I think the photos you posted already look quite nice. I wouldn't be afraid to upload them.

10th Aug 2015 22:16 UTCRock Currier Expert
11th Aug 2015 12:45 UTCMatt Courville
Matt
11th Aug 2015 14:06 UTCOwen Melfyn Lewis
If your camera is only capable of such basic white balance adjustment and you are concerned about exact colour reproduction, you must learn how to make this adjustment in post-camera processing of the image, using software like Adobe Photoshop or even Elements. Like what Rock said.
Owen
11th Aug 2015 18:14 UTCFlorian Baur


Mindat.org is an outreach project of the Hudson Institute of Mineralogy, a 501(c)(3) not-for-profit organization.
Copyright © mindat.org and the Hudson Institute of Mineralogy 1993-2024, except where stated. Most political location boundaries are © OpenStreetMap contributors. Mindat.org relies on the contributions of thousands of members and supporters. Founded in 2000 by Jolyon Ralph.
Privacy Policy - Terms & Conditions - Contact Us / DMCA issues - Report a bug/vulnerability Current server date and time: April 23, 2024 20:49:30