Home PageAbout MindatThe Mindat ManualHistory of MindatCopyright StatusWho We AreContact UsAdvertise on Mindat
Donate to MindatCorporate SponsorshipSponsor a PageSponsored PagesMindat AdvertisersAdvertise on Mindat
Learning CenterWhat is a mineral?The most common minerals on earthInformation for EducatorsMindat ArticlesThe ElementsThe Rock H. Currier Digital LibraryGeologic Time
Minerals by PropertiesMinerals by ChemistryAdvanced Locality SearchRandom MineralRandom LocalitySearch by minIDLocalities Near MeSearch ArticlesSearch GlossaryMore Search Options
The Mindat ManualAdd a New PhotoRate PhotosLocality Edit ReportCoordinate Completion ReportAdd Glossary Item
Mining CompaniesStatisticsUsersMineral MuseumsClubs & OrganizationsMineral Shows & EventsThe Mindat DirectoryDevice SettingsThe Mineral Quiz
Photo SearchPhoto GalleriesSearch by ColorNew Photos TodayNew Photos YesterdayMembers' Photo GalleriesPast Photo of the Day GalleryPhotography
╳Discussions
💬 Home🔎 Search📅 LatestGroups
EducationOpen discussion area.Fakes & FraudsOpen discussion area.Field CollectingOpen discussion area.FossilsOpen discussion area.Gems and GemologyOpen discussion area.GeneralOpen discussion area.How to ContributeOpen discussion area.Identity HelpOpen discussion area.Improving Mindat.orgOpen discussion area.LocalitiesOpen discussion area.Lost and Stolen SpecimensOpen discussion area.MarketplaceOpen discussion area.MeteoritesOpen discussion area.Mindat ProductsOpen discussion area.Mineral ExchangesOpen discussion area.Mineral PhotographyOpen discussion area.Mineral ShowsOpen discussion area.Mineralogical ClassificationOpen discussion area.Mineralogy CourseOpen discussion area.MineralsOpen discussion area.Minerals and MuseumsOpen discussion area.PhotosOpen discussion area.Techniques for CollectorsOpen discussion area.The Rock H. Currier Digital LibraryOpen discussion area.UV MineralsOpen discussion area.Recent Images in Discussions


Field CollectingApproaches to mounting specimens

1st May 2018 19:36 UTCHiro Inukai

For thumbnail or miniature sized specimens, I've found that moldable thermoplastics can work really well for mounting and presentation, although using it takes a lot of practice and can be labor intensive.
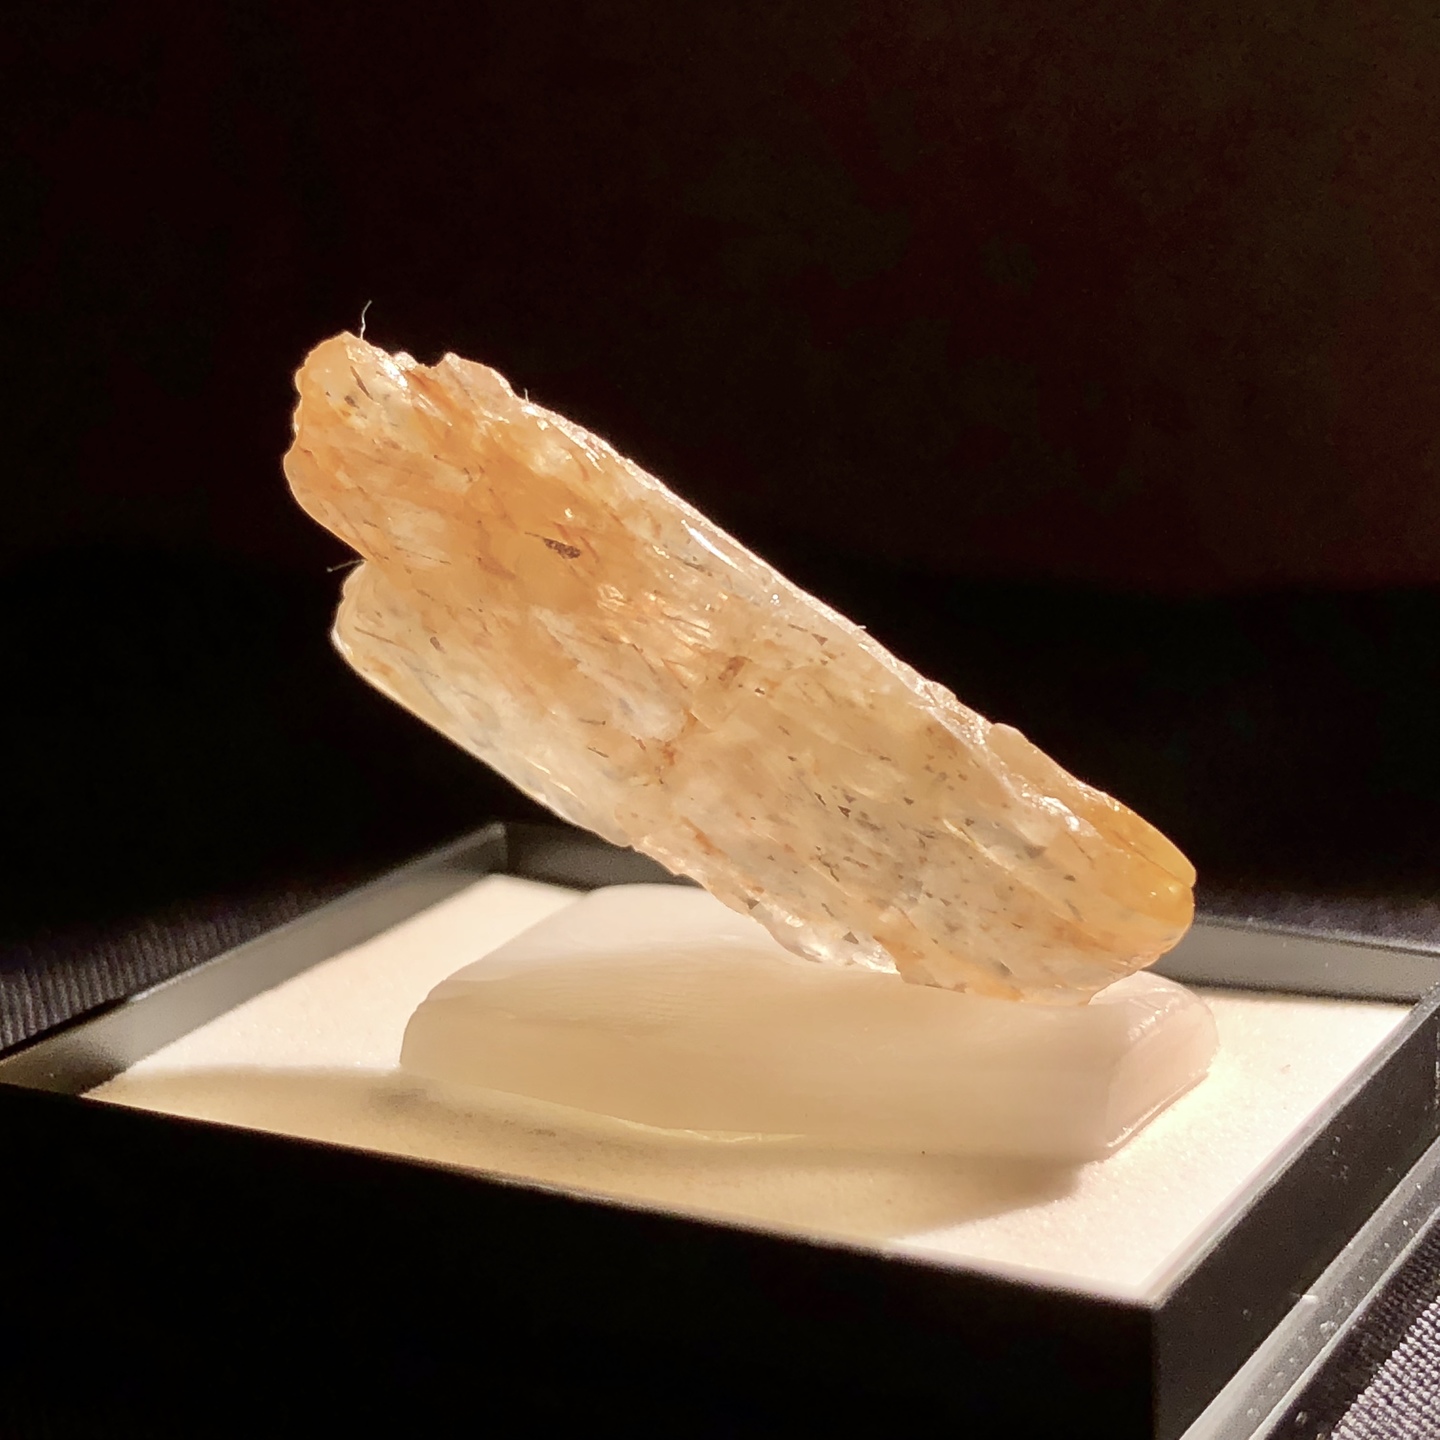
Here's an example:
I wanted to mount this piece at an angle in the box, but I didn't like the idea of wedging it in styrofoam--it's not as clean of a look (not to mention I couldn't actually find suitable styrofoam for this purpose). So I used a product called InstaMorph (but there are other brands with similar products), which comes in pellet form--I happened to have it already as I had bought some a while ago for a different purpose. You put the pellets in hot water and they become pliable enough to work with. When soft, I carefully press the specimen into a wad of the plastic and hold it steady until it cools enough to hold its shape. When fully cooled, thin pieces can be cut or shaved down with an X-Acto knife. This stuff gives me a lot more control over the placement of the specimen in the box, and can do things Styrofoam can't. Also, it won't stick to the specimen unless excessively hot (let it cool a bit before pressing anything into it). And unlike mineral tack, it doesn't leave a residue. I wouldn't use it for micromounts or cabinet sized specimens, or anything super fragile.
Frequently, I find that the specimen won't need mineral tack or adhesive to sit in the plastic on its own, but it isn't actually attached or locked in place unless you do glue it down. I do use glue dots or putty to attach the plastic base to the box. Personally, I find the process therapeutic...mounting specimens is very satisfying to me for some reason, so I don't mind taking the time to make custom display bases for each one.
1st May 2018 19:54 UTCWayne Corwin
I would guess these melt again if exposed to warm temps?
Like in a sunny window or in a hot car?
Where are your lables for the specimens?
1st May 2018 21:22 UTCHiro Inukai
As for labels...that's my next project, I promise! I'm trying to decide how best to go about it. I read the thread about "lifesaver" labels but some of my samples would really have their aesthetics diminished by a directly affixed label that is large enough to be legible.
2nd May 2018 02:45 UTCKeith Compton 🌟 Manager
Many museums have problems with artifacts for various reasons and attach a label via a small thread (silk or the like) so that only the silk thread is glued to the specimen and the label itself is of course at the other end of the thread and placed underneath the specimen. In your case a tiny thread may be visible (like a tail) from the specimen to the underside.
I doubt if much would then be seen when on display so there would be little to dsitract from the aesthetics. In your case the label would be underneath the white base within the box and only a small "line' which could be the same colour as the white base would show. You could even place a small "groove" in the white base behind the specimen to further "hide" the thread.
I would then attached a separate printed label to the underside of the of the display box itself and place a similar label on the back of the display box - visible from the front.. And of course photograph the specimen, upload to Mindat thus creating a minID, and have a further "lifesaver".
Cheers
2nd May 2018 06:02 UTCJim Allen
Jim
2nd May 2018 13:40 UTCRolf Luetcke Expert
Seems each specimen has its own box, labels can be put under the box either glue or using labels with self stick on one side. In my case I never have anything on my specimens since most are thumbnail or micro, no room for labels or number there but all my boxes have labels on them. Switching lids won't mess things up that way either since the specimen is on the bottom of the box.
Nice display was also my view.
Rolf
2nd May 2018 15:48 UTCDonald B Peck Expert
I am a micro collector who apprecieates thumbnails. On a slightly larger scale, you are facing the same problems that "micromounter" face. I am going to differ a bit from the others. I think your use of the thermoplastic is innovative, interesting, and useful. And you mentioned that the specimen is loose in the plastic mount unless you glue it in.
If I were you, I would glue it in place with white glue. It is water soluble, so your specimen is easily removed if or when you wish. I think you can better protect your specimen this way. I would also glue the plastic base to the bottom of the box. As to labels. I agree with you that it is difficult to glue a "fail safe" label on the specimen. Most thumbnail collectors that I know cut the label to fit upright in the back of the box (inside). That makes it easy to see and being inside the box, it is as fail safe as anything glued to the specimen. Unless your specimen is firmly fixed in the box, I would not put the label on the outside, bottom of the box.
Don

2nd May 2018 19:55 UTCRonald J. Pellar Expert
Your idea of thermoplastic is a good one but a word of caution with some specimens that are temperature sensitive. I would also recommend along with others above that you use white glue to cement the specimen in the mount. Handling the boxes is a lot more secure that way, particularly if you put labels on the bottom. :-)
2nd May 2018 23:58 UTCKeith Compton 🌟 Manager
I then like to see a label on the underside of the box AND on the back of the lid. The one on the back of the lid is for easy identification and display purposes. The underside label is a neat way of ensuring that if the lid becomes separated from the specimen, there is still a label attached to the specimen.
Particularly so if removing a lid for viewing under a microscope.
3rd May 2018 22:12 UTCGary Weinstein
4th May 2018 14:25 UTCEd Clopton 🌟 Expert
I would worry about legibility of transparent labels on transparent boxes with whatever is in the background showing through. Self-adhesive materials also tend not to be stable over time.

4th May 2018 14:49 UTCAndrew Debnam 🌟
6th May 2018 11:33 UTCAlysson Rowan Expert
Using laser-printed labels allows me to protect them with a quick coat of polyurethane (water-based) varnish. Inkjet printed labels would need an oil-based varnish.
All of my specimens that are not glued into boxes have an ID number stuck to them (smallest readable type-size printed on plain paper, and punched out using a hole punch).
Doing this, and using the hand-molding thermoplastic, the ID number would be hidden where the specimen is pressed into the plastic.
6th May 2018 21:01 UTCHiro Inukai


11th May 2018 22:46 UTCHiro Inukai

This raises an interesting question: if you have multiple specimens of a single type, as I do in this case, do you prefer to mount or present them together, or separately? For thumbnails and small specimens, that is my preference of course, but I think I would need to make an exception when the localities are different.


12th May 2018 04:56 UTCGregg Little 🌟
I have done several single crystal mounts in one box but I think it is just personal preference. I mounted several calcite crystal habits from different localities in one box that had fallen off larger matrix specimens and, because they were very good, I didn't want to throw them out; or was I just getting lazy?
12th May 2018 16:25 UTCGary Weinstein

12th May 2018 22:19 UTCJake Harper Expert


14th May 2018 04:10 UTCHiro Inukai
One of the challenges with using thermoplastic it is that it has a very high viscosity even when pliable. The higher you heat it, the less viscous it gets, but then it's too hot to mold with your bare hands. Solid pieces like the sort you're working with retain their heat longer and set more slowly and evenly. I like the idea of using a mold or jig--I would recommend that you make it from a material that allows you to work with it while submerged in water, so that you just put the pellets in, let them soften, then squeeze the water out before demolding. This should prevent sticking.
Another idea is to work with flat sheets. Roll out flat sheets, let them cool, cut them with a knife and straightedge, and carefully melt the edges together to make a hollow box, but I'm not sure if that will be to your liking, and it may be too labor intensive compared to making solid blocks.
And that's a really lovely aquamarine specimen you've got there!
29th Nov 2018 22:47 UTCAndrew Debnam 🌟
Andrew


Mindat.org is an outreach project of the Hudson Institute of Mineralogy, a 501(c)(3) not-for-profit organization.
Copyright © mindat.org and the Hudson Institute of Mineralogy 1993-2024, except where stated. Most political location boundaries are © OpenStreetMap contributors. Mindat.org relies on the contributions of thousands of members and supporters. Founded in 2000 by Jolyon Ralph.
Privacy Policy - Terms & Conditions - Contact Us / DMCA issues - Report a bug/vulnerability Current server date and time: April 19, 2024 20:46:01